Two Ingredient Dough
If you're like me, and you enjoy cooking, but also rely on easy recipes, then this my friend is right up your ally! Two ingredient dough. YUP you read that right, just TWO ingredients are needed for this and MAN OH MAN is it delicious! All it takes is, plain Greek yogurt and self rising dough-that's it! When you Google search two ingredient dough, a lot of websites will tell you equal parts of both. With my experience, and experience of others who I know t have also tried this, you have to add more flour as you are kneading the dough. I'm guessing that the amount of flour you use, depends on the water content in the yogurt you choose. BUT I'm getting ahead of myself. Let me take it back to step one!
 For step one, you need to gather your yogurt and flour. Also grab a large bowl, and a one cup measuring cup. I use good ol' Gold Metal self rising flour, and for yogurt I chose Chobani. I plan to test out other yogurts too, and I will definitely share my experience with all! If you've made this dough and used other ingredients, I'd love to hear about it in the comments below!
I start of with a cup of each and mix them until they form a dough. Don't be afraid to get your hands in there and really mix that dough. I had started off with using a fork, but lets be honest, our hands are our best tools! Once the flour and yogurt are mixed together into dough form, It's time to knead it. You'll notice the dough is very tacky at this stage, but don't panic, that's totally normal. You want the consistency of the dough to be sticky, but not so sticky that it's all stuck to your hands. This is where the 'add more flour' comes into play. While your kneading the dough, make sure you sprinkle a little bit more flour-as much as you need- to make a 'sticky' dough, not tacky. If you have a little stuck to you, that's perfectly fine, as long as the dough is manageable for the next step. The first batch I made only needed 1/4 cup more flour, but the second batch needed even more than that. I did notice that a lot of liquid had formed on the top of yogurt when I was making the second batch, so I drained it a bit before measuring, but I'm wondering if that's the reason why I needed more flour this time...I'm still learning!

When you're finished kneading the dough, it will look similar to this. I choose to knead the dough right in that bowl, but you can certainly flour a board and knead the dough on there. I just like to stick to the least amount of dishes possible!!!
 From here, cut the dough into four equal sections (if you're making bagels). If you like plain, then just roll them out, shape into bagel shapes, and brush with an egg wash. If you like some flavor in your life, you can choose to add the flavoring to the dough and knead it in (that's how I made the cinnamon raisin), or you can sprinkle anything on top of the egg wash. And I mean ANYTHING. If you prefer a savory bagel, you could use garlic powder or garlic salt, dried onion flakes, toasted sesame seeds, everything seasoning etc. The creativity is in your hands! For me, I prefer a sweeter bagel. My next adventure is going to be apple cinnamon and chocolate chip!
To save yourself some cleanup, you can stick these bagels right on top of parchment paper. Then pop them in the oven **on the top rack** for 25 minutes. Beware, your house will smell AMAZING as these babies are bakin'!
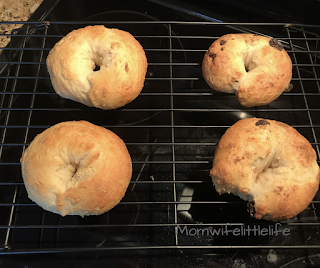 Let them cool on a cooling rack for about 10 minutes before you dip into them....learn from my mistake! They are HOT HOT HOT when they first come out! I mean it makes sense right? In my defense, I was SUPER excited 🤣.
Serve these babies however you want. I choose cream cheese, but I'm positive these can be enjoyed anyway you'd like!
There are other ways to make this dough, especially for those who have allergies or certain food restrictions. You can check out other combinations here.
Now this dough can be used for other recipes as well! If you read my last blog , you'll know that I plan to make some pretzel bites for the Super Bowl this weekend! This dough can be used to make pizza and garlic bread too! Have you used this dough for other treats? Please share! I'd love more opportunities to incorporate this easy dough in with other recipes!!
I hope you find this easy to follow! If you don't, feel free to ask any questions!
 For step one, you need to gather your yogurt and flour. Also grab a large bowl, and a one cup measuring cup. I use good ol' Gold Metal self rising flour, and for yogurt I chose Chobani. I plan to test out other yogurts too, and I will definitely share my experience with all! If you've made this dough and used other ingredients, I'd love to hear about it in the comments below!
I start of with a cup of each and mix them until they form a dough. Don't be afraid to get your hands in there and really mix that dough. I had started off with using a fork, but lets be honest, our hands are our best tools! Once the flour and yogurt are mixed together into dough form, It's time to knead it. You'll notice the dough is very tacky at this stage, but don't panic, that's totally normal. You want the consistency of the dough to be sticky, but not so sticky that it's all stuck to your hands. This is where the 'add more flour' comes into play. While your kneading the dough, make sure you sprinkle a little bit more flour-as much as you need- to make a 'sticky' dough, not tacky. If you have a little stuck to you, that's perfectly fine, as long as the dough is manageable for the next step. The first batch I made only needed 1/4 cup more flour, but the second batch needed even more than that. I did notice that a lot of liquid had formed on the top of yogurt when I was making the second batch, so I drained it a bit before measuring, but I'm wondering if that's the reason why I needed more flour this time...I'm still learning!

When you're finished kneading the dough, it will look similar to this. I choose to knead the dough right in that bowl, but you can certainly flour a board and knead the dough on there. I just like to stick to the least amount of dishes possible!!!
 From here, cut the dough into four equal sections (if you're making bagels). If you like plain, then just roll them out, shape into bagel shapes, and brush with an egg wash. If you like some flavor in your life, you can choose to add the flavoring to the dough and knead it in (that's how I made the cinnamon raisin), or you can sprinkle anything on top of the egg wash. And I mean ANYTHING. If you prefer a savory bagel, you could use garlic powder or garlic salt, dried onion flakes, toasted sesame seeds, everything seasoning etc. The creativity is in your hands! For me, I prefer a sweeter bagel. My next adventure is going to be apple cinnamon and chocolate chip!
To save yourself some cleanup, you can stick these bagels right on top of parchment paper. Then pop them in the oven **on the top rack** for 25 minutes. Beware, your house will smell AMAZING as these babies are bakin'!

 |
| Look at this beauty! |
There are other ways to make this dough, especially for those who have allergies or certain food restrictions. You can check out other combinations here.
Now this dough can be used for other recipes as well! If you read my last blog , you'll know that I plan to make some pretzel bites for the Super Bowl this weekend! This dough can be used to make pizza and garlic bread too! Have you used this dough for other treats? Please share! I'd love more opportunities to incorporate this easy dough in with other recipes!!
I hope you find this easy to follow! If you don't, feel free to ask any questions!


Comments
Post a Comment